 We will show you here step by step how to attach top stops to the upper end of a spiral zip fastener. U-shaped (also C-shaped) top stops
 A No.10 spiral zip fastener will be used as an example. With its approximately 6 mm wide spiral chain, it is often used in jackets and coats. If you would like to replace the main zip fastener in such clothing, e.g. because it is irreparably defective, you will rarely find a replacement zip fastener of exactly the right length. Therefore, take the longer zip fastener and shorten it at the upper end, also called the beginning of the zip fastener.
 After the excess length of the zip fastener has been cut off, the industrially attached top stops are not there anymore. The top stops prevent the slider from sliding off the zip fastener’s upper end. If you only cut spiral zip fasteners, you can also attach special top stops. However, these stoppers are only suitable for spiral zip fasteners and are only available in the natural silver-gray color of aluminum.
The universal top stops used here should not be pressed directly onto the spiral. This is because the U-shaped top stops are difficult to push far enough on the spiral, meaning that you can press them so that they surround the spiral well, hold permanently and the result even looks reasonably good. Therefore, it is better to remove the zip fastener spiral in the places where you want to attach the top stops.
 Position end cutting pliers exactly at the selvedge of the tape as shown and catch approximately half the spiral width with the jaws. Then cut off the grabbed part of the spiral. Avoid cutting the sewing threads as they will hold the filler cord even after you remove the spiral. Instead of end cutting pliers, you can also cut with sharp, narrow scissors.
 Now remove the remains of the spiral from the sewing threads, e.g. using pointed scissors.
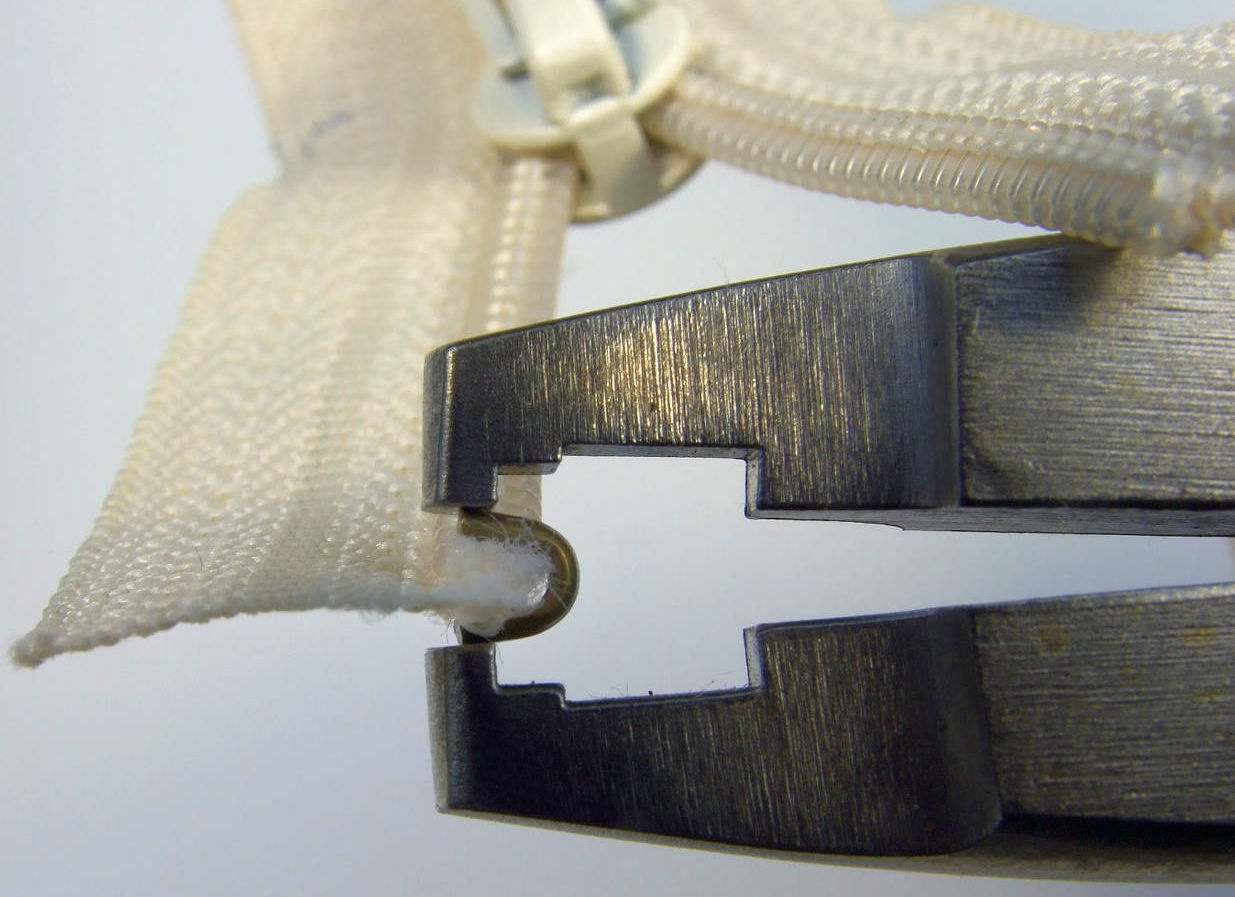
 The fiber bundle expanding out of the end of the plastic spiral is called filler cord. Do not cut off this filler cord, because it will also fill the top stops to be attached, making them fixed more tightly and barely able to slip when mechanical strain is put on them. The picture also shows the remains of the spiral cut off lying next to the zip fastener.
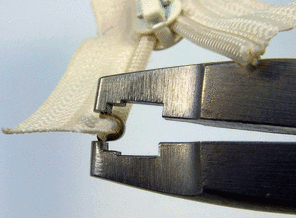
 Place a top stop right in the front between the jaws of suitable pliers.
 Larger top stops can be placed one step back between the jaws of the Osborne pliers. The top stop can be aligned and held on step edges better than at the front with no step edges.
Also, make sure to position the top stop as close as possible to the spiral. If the gap between the spiral end and the top stop is too big, the slider wedge will not not open the zip fastener spiral chain after it closes completely. The slider will then jam in the foremost position.


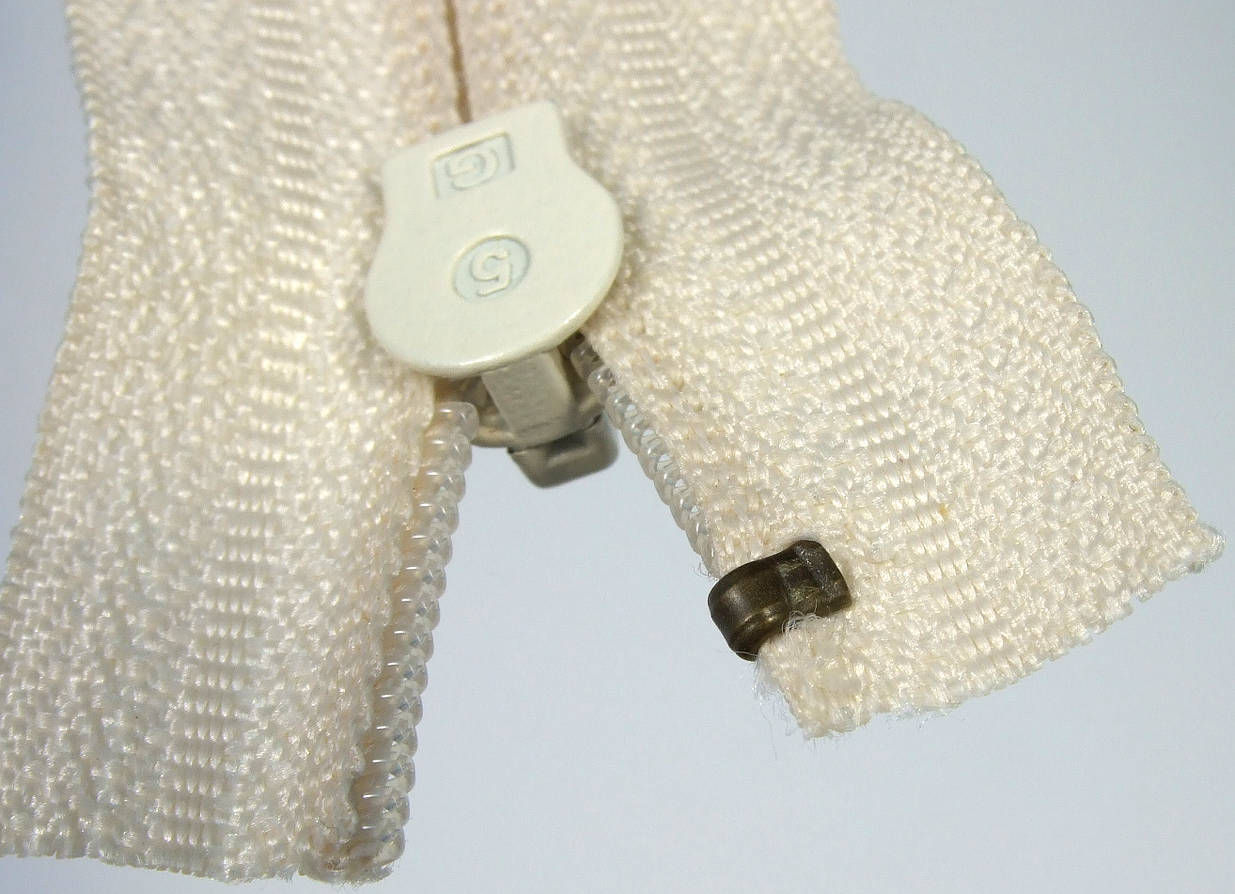
 This is how the completely pressed top stop looks from the top and bottom of the spiral.
 Only one top stop is sufficient for the slider not to slide off the end of the zip fastener. But if you close the zip fastener completely, the slider only hits this one top stop that has to absorb all the force of the impact. That is why it will be safer and more durable if a top stop is attached on each side of the spiral chain. The top stops are mostly hidden in the slider channels when it closes the zip fastener completely.
Privacy notice: The following video opens in our channel on the YouTube website.
Removing 3 mm thick metal zip fastener teeth using SX end cutting pliers
Privacy notice: The following video opens in our channel on the YouTube website.
Attaching top stops RT25 on spiral zipper No.25 with 10 mm chain width using Osborne 1012 pliers